Tips on Getting Sharper Images with Manual Focus Lenses
Jan 26, 2017
Jake Hicks

We love it when our readers get in touch with us to share their stories. This article was contributed to DIYP by a member of our community. If you would like to contribute an article, please contact us here.
Share:
Tips on Getting Sharper Images with Manual Focus Lenses
Jan 26, 2017
Jake Hicks
We love it when our readers get in touch with us to share their stories. This article was contributed to DIYP by a member of our community. If you would like to contribute an article, please contact us here.
Share on:

Ever since Leica presented a camera at the 1976 Photokina with working automated focusing, autofocus technology has taken leaps and bounds in its advancement. Today’s autofocus cameras are nothing short of miraculous to the point at which it’s hard to imagine where the advancement can go from here. But photographers didn’t always have focusing this easy.
This article aims to provide you with three key areas that if followed correctly should practically guarantee nailing pin-sharp manual focus shots in no time.
This is the first part in a two part article on manual focusing and in part two we will look at some additional tools that you can purchase to aid you in your quest for sharper manual focus shots. Let’s get started!
Autofocus History
Although autofocus seems like a given staple of our photographic lives now it’s only really seen consistent success beyond a gimmick since the mid 80’s and early 90’s. Although Konica brought the first mass produced autofocus SLR in the form of the C35 AF to market in 1977, it wasn’t until 1992 when Nikon properly integrated motors into the lens itself that autofocus became not only quick but somewhat reliable.

Why bother with manual focus lenses?
Photography and focusable lenses have been around since the early 1800’s and considering that autofocus didn’t come into play until the 1980’s, that’s a whole lot of lenses that were never autofocus compatible and a whole lot of manual focus lenses that can still create some gorgeous shots.

But it’s not just the older ‘vintage’ lenses that are manual focus, there are new manual focus lenses being released all the time known as ‘art’ lenses. These are the lenses being created by companies like Lensbaby and Lomography that create a specific look that cannot be recreated with a modern autofocus lens. Learning to manual focus these modern lenses is exactly the same as learning to focus the vintage ones so once you learn it, you’re set to explore literarily thousands of manual focus lenses from all around the world.
Also, let’s not forget that we’re in the minority here, those of us that are prepared to work a little harder for an awesome looking shot will be rewarded. That reward comes in the form of thousands of old manual focus lenses that are crazily cheap, I’ve picked up some absolute killer lenses for as little as £30 to £50 which is fantastic.
But are manual focus lenses really still viable? Is the hassle of using a manual focus lens really worth the effort? It’s my opinion that it most definitely is worth the effort because with a little practice and patience we can open up a whole new world of lenses that really do create some fantastic and unique looking shots.

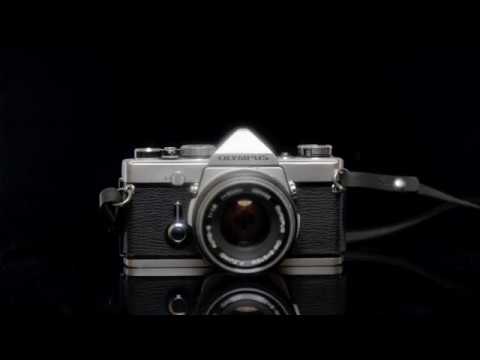
I’ve been manually focussing lenses for a very long time so I’m a little more used to them than some people. In fact my first camera that was my fathers old Olympus OM-1 and that only had manual focus lenses. to focus properly on that you had to peer through the viewfinder and line up the two adjacent semicircles. When they aligned you knew your shot was in focus. The point I’m making here is that manual focusing to any degree of consistency is a skill like any other, it takes practice and you need to train your eye to know what to look for. So if you’ve ever given manual focusing a go or if you’re about to give it a go, don’t be disheartened straightaway, stick with it and I promise it will get easier.
Some tips on making manual focusing easier
Below I will go over the three key things that I think you need to bear in mind to ensure you the best possible number of pin-sharp images.
1. Ambient Light
First and foremost is lighting. I’ll be honest, manual focusing outside in the middle of the day with plenty of bright lighting and a ton of detail to focus on is relatively easy. I highly doubt that many of you are here because you’re struggling to focus outside. I shoot 99% of my work in a room with no windows so believe me when I say that if you can manual focus inside in a studio with limited ambient light, you can manual focus almost anywhere.
Unfortunately, lighting is also the biggest problem, everything I shoot is with flash so although the final shot looks bright once the flash has fired, focusing in the dim light of a tungsten modelling bulb certainly isn’t. So first and foremost turn as much ambient light on in the studio as you can stand.

You don’t have to set your shot up with all the lights on if you don’t want to, you can just have the modelling bulbs on to place your lights but once you’re happy, turn all the studio lights on to focus.
If you’re unsure if all that lighting is going to affect your shot then turn the flash triggers off and fire a shot in the ambient light to see if anything registers on the camera. It’s highly unlikely that even with all the lighting on in the room that anything will show up though because we’re often shooting flash at 100ISO with shutter speed in excess of 1/160. You’d be surprised how much ambient light you need to register on the sensor with settings like that.

2. Catchlights
I am going to assume for this section that you’re trying to get your subjects eyes in focus as a priority. If for some bizarre reason pin-sharp eyes aren’t your thing then you can by all means skip this step.
As anybody who has been to my workshops will tell you, I preach/teach until the end of time about getting clean and clear catchlights in the subjects eyes and this is never more important than when you’re trying to manually focus on a models eyes. Catchlights are the spectral sparkle of the lighting in the subjects eyes – Check this diagram for more information. If you don’t have catchlights in the models eyes then it becomes very hard for us to tell when the shot is in or out of focus because there’s simply not enough contrasting data or detail for us to differentiate between in-focus and soft-focus.

Catchlights are not always about light placement though and it can simply be that the model has moved in such a way that you are no longer seeing the tell-tale sparkle. Of course it could just simply be you, you may have moved to get a better angle so now the catchlights have disappeared in your subjects. Either move the lighting, yourself or the subject to get them back, doing so will greatly increase the chance of you getting a sharper shot.
3. The Technique
Lastly I’ll go over what I think is the best technique to use when manually focussing a shot. The technique I’m referring to is the way in which we visually ‘lock-on’ to the correct focus point by visually recognising when the shot is in focus so that we may ultimately take the picture. Some very experienced street photographers are so adept at manual focusing that they will not even need to look through their viewfinder to get a sharply focused shot. I know this sounds unlikely but some of these street-shooters are so familiar with their camera and so adept at visually judging distance that they merely have to look at how far away their subject is and dial that distance into their lens via the scale on top. This is a seriously impressive skill indeed and unfortunately one that takes many years to master, for the rest of us mere mortals we have to find other ways to help us get there.
It’s my advice that when you start manually focusing a shot that you aren’t afraid to make big movements on the focusing ring. I see people using a manual focus lens for the first time and tentatively tweaking the focus ring looking for that ‘sweet-spot’. I understand why we start off doing that, we’re really trying to analyse the scene and we’re concentrating on what’s in focus and what’s not in focus and to do that we only move the focus ring a tiny amount at a time.

The problem with this technique is that our eyes are full of tricks to help us through our busy and tiring days, our eyes love to fill in the details for us based on the surrounding data we feed them. For example our eyes take in data at a very slow 60 frames per second, if stuff happens faster than that, like if a light flashes 80 times a second, then our brain reads that as the light being constantly on and not flashing at all.
This is rarely a problem and most of us go about our days without incident or fear of what’s happening between those frames. The issue becomes a little more noticeable however when we’re trying to concentrate on something that is only visually changing very slightly, the in-focus and out-of-focus object or scene becomes harder and harder for us to discern as changing at all the longer we look at it.
As a result it becomes harder for us to accurately judge focus when we concentrate like this and if you’ve tried it with regards to manual focusing you may well remember that you had to stop looking, even look away from the viewfinder for a moment and even rub your eyes before going back to try and focus again. This is simply the eyes and brain failing to concentrate for long enough and to ultimately distinguish between a seemingly unchanging scene.
Nerd-alert
Frame rate and how we visually interact with our world is actually an incredibly complex subject and I’m aware that I am simplifying it greatly here for the purpose of this. I’m certainly no cognitive neuroscientist and you don’t need to be to understand what’s going on to focus a damn camera, but it does help to know that it isn’t simply you being unable to focus, your eyes and brain are literally making it harder for you. I also broadly mentioned that we have a visual frame-rate of 60 frames a second but some peoples frame-rate can be as low as 40 or even as high as 250 (allegedly fighter pilots can train themselves to actually distinguish content that is displayed to them at 1/225th of a second). My point being that manual focusing is a skill and you need to train yourself to get good at it just like anything else. The longer you do it, the better you’ll become at being able to distinguish micro changes in the scene in front of you and nail focus every time.
So what’s the best way to force your eyes and brain to concentrate? My advice is simply to make big focusing changes not tiny ones, turn the focus ring a lot more than you think you need to and ‘scan’ through the sharp focal range relatively quickly. It’s a technique I refer to as ‘snap’ focusing and that way your eye will be forced to notice these changes and spot the ‘in-focus’ section a lot more clearly. Once you’ve zeroed in on it, quickly adjust to that area and scan in and out of it in smaller and smaller movements, each time getting closer and closer to the sweet-spot. The trick here is actually speed, if you linger for too long your eye will loose attention and the ability to discern changes and thereby actually making it harder and harder to nail it. If this happens, simply reset back to making big adjustments again and your eye will reengage and the process will start again.
I’ve recorded a few videos below to try and illustrate what I am referring too. The videos on the left show the image being focused and the videos on the right show the hand on the focusing ring and the speed and method being used to focus that correlating image. I couldn’t get both videos to play in the same video so my advice is to simply play the two videos side-by-side simultaneously to see what’s going on.
Manual Focus with “Snap focus”

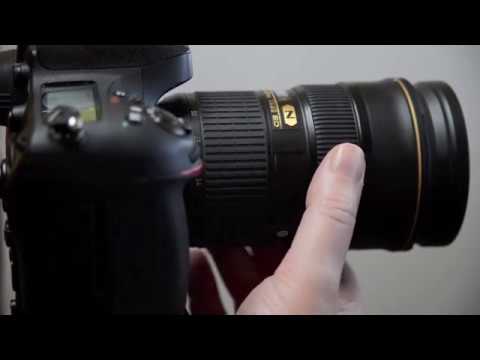
The two videos above show the ‘snap’ focusing method being applied. It’s my opinion that this rapid scanning through the sweet-spot results in more images being in focus as your eye is forced into concentrating on what’s happening. Play both the videos at the same time to understand what’s going on in the shot.
Manual focus using “Slow focus”
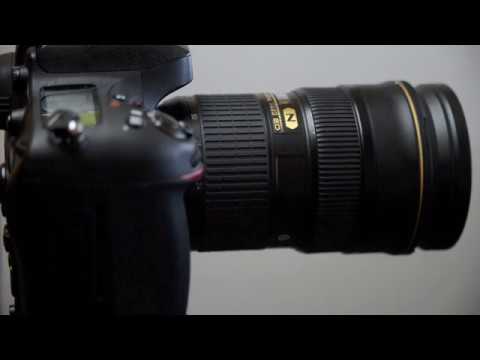
In these two videos above I show what most people tend to do when they first start using manual focus lenses. The instinct is to get the image as close to sharp quickly and then fine tune from there. It’s been my experience that this actually takes longer and subsequently produces poorer results as your eye struggles to concentrate on fractional changes in the image. Play both of the above videos simultaneously to see what the focusing hand is doing in relation to the image.
To Conclude
I know that is an insanely long winded way of explaining how to focus a lens but I feel it should help when you realise it’s not just you that struggles with it. Our eyes aren’t designed to distinguish between fractional changes in a scene and they will very quickly disengage concentrating when they feel they’ve acquired all the information they see in front of them. It’s this reason that many people loose hope and patience with manual focusing and don’t stick with it, but trust me when I say it isn’t you, and it’s perfectly normal to struggle to begin with.
As I said at the top, manual focusing is a skill like any other, it takes practice to get good at it. Give yourself the best possible chance of nailing focus though by firstly doing it in an environment that is as bright as possible. Secondly, make sure that the thing you’re trying to focus on has some contrasting elements, for example catchlights in the eyes. Lastly, force your brain and eyes to engage and concentrate by providing them with ever-changing data, scan through the focus point in larger movements first and then quickly zero in on the sweet-spot before your eyes get bored and literally loose focus.
Stick with it though as there are literally thousands of crazy cheap manual focus lenses out there that produce something visually unique and engaging and that is well worth all the extra effort in my opinion.
If all else fails…
You may be relieved to hear that if all that sounds like hard work there are some relatively inexpensive hacks out there that can be utilised to great effect to aid in manual focusing. Essentially with a few additional tools you can negate the need to put all this into practice and a review and rundown of those tools will be revealed in next weeks post. I shall see you all in part 2.
Let me know your thoughts below though and if you have any tips and words of advice for others or myself then I’d certainly love to hear them :)
About The Author
Jake Hicks is an Editorial and Fashion photographer, an educator at Amersham Studios based in the UK, and the creator of the Jake Hicks Photography Gel Packs. You can see more of Jake’s work over on his webpage or training page, and interact with him over at Facebook, Instagram, 500px, Twitter and flickr. This article was also published here and shared with permission
We love it when our readers get in touch with us to share their stories. This article was contributed to DIYP by a member of our community. If you would like to contribute an article, please contact us here.


Join the Discussion
DIYP Comment Policy
Be nice, be on-topic, no personal information or flames.